Megalith Guide
Megalith are a Rock-Type Ritual deck that was introduced into Duel Links in the Chronicle of Glory Mini-Box on July 13, 2020 (and around January 2020 in the TCG in Ignition Assault). It is by far our most advanced Ritual deck in Duel Links at the moment. They don’t rely on Ritual Spells, and purely Ritual Summon using their monster effects, making Senju of the Thousand Hands an incredible searcher for the entire deck. The deck is capable of going first or second, and has a relatively good matchup against many different decks. Its main weakness is massive backrow removal from decks like Cyber Dragons and Blackwings, but it is inherently able to maindeck Artifact Lancea which is a great counter to Cosmic Cyclone.
Future archetype support could include Megalith Phul, Megalith Unformed and/or Megalith Aratron, and of these, realistically we might get Aratron, possibly Phul, but for now, what we currently have is still competitively-viable, if not King-of-Games-viable.
Here is a quick start guide on what Megalith does, and some of the advanced plays it can do going second.
Megalith In A Nutshell:
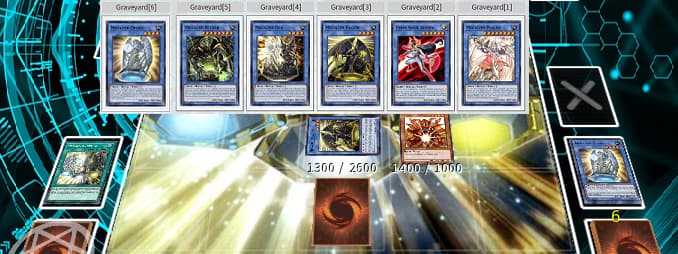
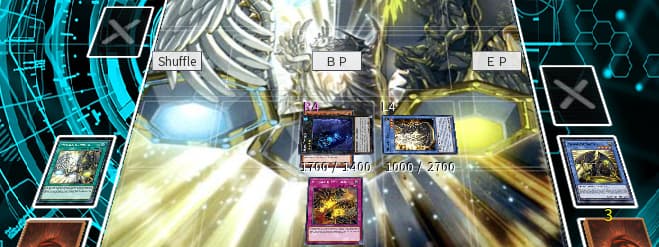
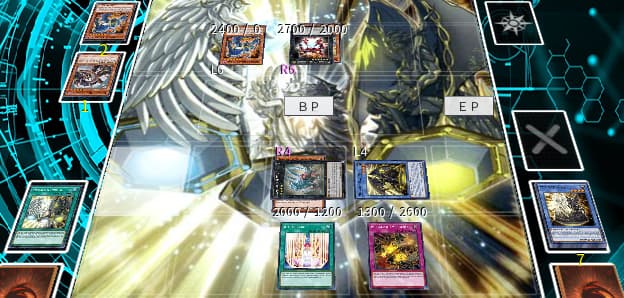
Also, examples of Megalith gameplay are shown below, so you can see how the deck works. Note that metas will shift, so these only serve to show you how Megalith plays, not necessarily recent meta matchups.
Advanced Interactions/Plays (playing around Floodgate, chain blocking, and more!):
Even MORE Advanced Plays (negate Levianeer, chain block Strike Bounzer, and more!):
How to Beat Heavily-Destructive Matchups (Cyber Dragons, Thunder Dragons, Fire Kings, etc.):
KC GT June 2021 Stage 2 (Going-Second Strategies):
Here are the most recommended skills for playing the deck.
-
Master of Rites II


This is the strongest skill for the deck, purely because of so many people either not reading Ritual Cage, or not having the sufficient removal to get rid of Ritual Cage AND your monsters in time.
-
Level Augmentation

This was the first skill used with this deck on-release, because it would more-easily enable summoning Megalith Bethor on the opponent’s turn using only a Lv4 on your field without using anything in your hand. Nowadays this is not as recommended, but can be used if you don’t somehow have Alexis Rhodes unlocked or Master of Rites II obtained yet.
Here are 3 sample builds. This may be updated depending on how different builds look over time, but these are the most common variants. Most people tech in either Cyber Angel Dakini or Artifact Lancea, or both because Benten searches Dakini and Lancea, or any LIGHT Fairy.
DiamondDudeTCG, KoG June 2021


Timaeus’s Notes: I can imagine Patriarch being good to make twice against Harpies. The rest is fairly standard. It’s possible he didn’t face many Thunder Dragons on his climb, but Roach certainly would be useful there.
dimbrotis, KoG May 2021

Timaeus’s Notes: Dire Wolf, Samurai, and Malevolent Sin are currently the core Extra Deck monsters shown here. The rest are up to your available card pool. Patriarch is nice against decks like Harpies (and Cyber Dragons to some extent). Heliopolis is great against backrow decks and for unclogging. Roach is fantastic against decks that summon big monsters without starting a chain, like Chaos Dragon Levianeer, Lv5+ Synchro monsters (on Chain Link 1), or Lv5+ Contact Fusions (e.g. Ritual Beast).
timaeus222’s Current Build (June 2021 KC GT)

Timaeus’s Notes: Diamond Dire Wolf is incredible for baiting out backrow. Number 70: Malevolent Sin helps bait out negates against Witchcrafters, or can steal games by moving a big monster aside that Blackship of Corn wouldn’t be able to send away when you’re behind, and Gagaga Samurai with Megalith Phaleg boost is easy OTK. Steelswarm Roach (NOT once per turn!) is insane against Thunder Dragons as another counter to Levianeer, even without Lancea. Making him turn 1, even with unoptimal setup, can save you. Heliopolis is insane because he can tribute Benten to nontarget destroy card(s), and get further advantage to have follow-up. Lastly, Abyss Dweller comes up a lot against decks like Crystrons (turn off uh, everything), Desperado (no Buddy Force float or Desperado search), and Blue-Eyes (turn off Ancients!).
These are the main cards of the Megalith deck. This deck is mostly standardized/optimized at the moment, at 21-22 cards. A brief overview on their mechanics is as follows:
- The Lv8 Megaliths discard themselves to act like Ritual Spells (HARD once per turn), tributing monsters from hand or field to Ritual Summon specifically a “Megalith” Ritual Monster from hand.
- The Lv4 Megaliths have effects upon their Ritual Summon (NOT once per turn!), as well as effects on the field that perform a Ritual Summon (HARD once per turn) that MUST use themselves as one of the materials.
Also, there are three important things to keep in mind about Ritual Summoning that are really helpful for this deck:
- The Lv8 Megaliths can tribute off a Lv8 for the Ritual Summon of a Lv4, which can help unclog your board (especially if that Lv8 got Floodgated), and enable Rank 4 Xyz plays as well.
- The Lv4 Megaliths MUST use themselves as one of the materials if their effect to Ritual Summon is used. Be careful that you pick the activating Lv4 Megalith as material FIRST, so that you don’t accidentally use the wrong materials for the remainder of the levels (just a Duel Links quirk).
- You can Ritual Summon a Lv6 using 2 Lv4’s, a Lv8 using 2 Lv6’s, a Lv8 using 2 Lv4’s, and a Lv8 using a Lv8, among other combinations (if any). How do I know this? There is something known as the “Pebble Ruling” to keep in mind, which basically restricts how you are allowed to exceed the level requirement. A good example is that if you are using a Lv4 Megalith to Ritual Summon a Lv8, the only other allowed materials are Lv4-7 because you cannot purposefully exceed Lv8 to Ritual Summon a Lv8 when you would be required to use the Lv4 Megalith as material as well (by its own effect).
Megalith Bethor (3x):

This is your main win condition. If you manage to summon this guy on the opponent’s turn, you can usually target and destroy 2-3 cards, depending on the number of different Ritual Monsters in your GY at the time of activation, and that’s incredible disruption. Remember: He can ONLY Ritual Summon “Megalith” Ritual Monsters.
Megalith Hagith (2-3x):

Hagith searches your “Megalith” Spells/Traps, namely Portal and Emergence. Remember that he CAN Ritual Summon non-“Megalith” Ritual Monsters.
Megalith Ophiel (3x):

Ophiel searches your Lv4/Lv8 “Megalith” Ritual Monsters (but not Benten nor Dakini). Remember that he CAN Ritual Summon non-“Megalith” Ritual Monsters.
Megalith Phaleg (3x):

This is the other Lv8 Megalith, and can be a good win condition late game. He gives a huge boost to your monsters—300 ATK/DEF for each Ritual in your GY. Also, he DOES stack, so two Phaleg will mean 600 ATK/DEF for each Ritual in your GY. NOTE: He can ONLY Ritual Summon “Megalith” Ritual Monsters.
Megalith Och (1x):

Och allows you to Ritual Summon ANY Ritual Monster as a Quick Effect in the Main Phase. The main thing to watch out for is if your opponent fakes ending the Main Phase by going to Battle/End Phase early (similar to if one faces Witchcrafters). Use your best judgment to see if they have any follow-up or if they just foolishly ended their turn thinking they could trick you. Basically, after Och resolves and you use Bethor to destroy your opponent’s board, your opponent could still set new backrow, so watch out for that.
Senju of the Thousand Hands (3x):

Senju searches ANY monster in your deck, including the Cyber Angels and all the “Megalith” monsters. Super valuable! He also gives you indirect access to Artifact Lancea, which helps counter Cosmic Cyclone.
Megalith Portal (1x):

Portal recovers Ritual Monsters from the GY when you Ritual Summon a “Megalith” Ritual Monster (and not any other kind of Ritual Monster). Also, Portal protects EACH of your Ritual Monsters from battle destruction, once per turn. That means if you have 3 Ritual Monsters, all 3 are protected by battle once each. Also, in Duel Links right now, Portal is programmed to go Chain Link 1 to Bethor being Chain Link 2, which surprisingly allows you to pop Necrovalley and recover resources, ignoring the fact that Necrovalley would have not let you recover anything.
Megalith Emergence (1x):

Emergence is like a Call of the Haunted (but NOT just one use), and summons in Defense hard once per turn. The monster revived will go back to the bottom of the Main Deck when it leaves the field, unless used for Xyz material (in which case it goes to the GY when the Xyz monster leaves the field). Note that Trishula, the Dragon of Icy Imprisonment cannot use a monster revived by Emergence as a material for its Special Summon method because the monster would not get banished while paying the cost of summoning.
Cyber Angel Benten (2-3x):

A wonderful searcher for the deck who, when tributed, can grab Senju of the Thousand Hands, Cyber Angel Dakini, and Artifact Lancea, among other LIGHT Fairy search targets. She also chain blocks Bethor from being negated by cards that negate effects that target the opponent’s cards (Crystron Impact, Dark Cavalry, etc) because her Trigger Effect is programmed to go on a higher Chain Link number than Bethor (and Dakini), covering up the monster that could get negated.
Cyber Angel Dakini:

Dakini is nontargeting, nondestructive removal that gets around all protection (even “unaffected” monsters). An easy out to monsters like Shiranui Sunsaga, Hazy Flame Basiltrice, and Lunalight Sabre Dancer. She also gives piercing damage as a win condition, which gets a bit insane because she can get over 5000 ATK sometimes.
Artifact Lancea:

This is one of the best search targets of Cyber Angel Benten, able to stop Cosmic Cyclone from resolving, as well as stopping things like Shiranui Spectralsword from resolving or Galaxy Cyclone from activating from the GY. It also stops Cyber Dragons from doing their Fusion Gate combo!
D.D. Sprite:

A search target off of Benten, which allows one to go into a Synchro like Vermillion Dragon Mech, for example. Can also be good for unclogging at the same time.
Demise, Agent of Armageddon:

This is a very interesting option, and most likely, CandyCrusher’s reason for using it is to add the inability to respond to a Ritual Monster’s effect activations, which plays through negates and ensures Megalith Bethor goes through with no issues.
Gagaga Samurai:
A basic toolbox Xyz monster that, when paired with Megalith Phaleg, enables a quick OTK because he gets huge with his two-attack effect!
Diamond Dire Wolf:
A backrow/monster removal toolbox Xyz monster. Usually good for baiting out backrow early.
Number 50: Blackship of Corn / Number 70: Malevolent Sin:

This is a good Xyz toolbox monster for when you are facing a monster that floats on destruction (like Spiritual Beast Tamer Winda), or when you want to bait out negates from a monster like Witchcrafter Madame Verre. Malevolent Sin as an alternative option can steal games more quickly against a big monster when you are behind.
Hieratic Sun Dragon Overlord of Heliopolis:
A great way to unclog, but more importantly, he can tribute any number of monsters from your hand or field to destroy cards on the field (nontargeting). Very scary, and he can get huge if he’s backed up by a Phaleg. Tributing Benten feels great, giving you further follow-up.
Abyss Dweller / Steelswarm Roach:
Both of these are good, but can be situational. Abyss Dweller is great against GY-reliant decks, for things like: forcing Noble Knights to go Rank 4 (uh, maybe not the best idea, since you’re guiding them towards 4-igus), turning off Ancients in Blue-Eyes, turning off Winda in Ritual Beasts, etc. Steelswarm Roach is fantastic against Blackwings and Thunder Dragons to negate Synchro Summons and Levianeer (try not to use it on Duo if possible).
Here are all the major combos, and/or advanced plays the deck can do. DISCLAIMER: Shown are sample hands (or sample card pools available from the field and/or in the hand), but you may be able to achieve the same play if you have access to that hand with certain substitute cards (like Benten giving you Senju to use after being tributed).
Before proceeding, here are some rules of thumb:
-
If you can tribute a Benten from the hand instead of a Senju on the field, consider tributing Benten instead. Depending on the matchup, you could search Artifact Lancea and keep your Senju to be used as Ritual material (despite popping 1 less card with Bethor if you do so, it may help if you are avoiding OTK over an attack position monster).
-
Think ahead; if your hand is not so good, and you realize you can only get 1 Hagith search, then if the deck you are facing is very aggressive, it may be better to search Portal than Emergence. If you are facing a control deck, you might rather search Emergence to have an Xyz play next turn. Plus, if they Floodgate your monster, you have no fear of it getting Karma Cutted, nor will it return to the deck so that you cannot revive it again (because it forgot by being flipped).
-
If you believe that you might see Floodgate/Canadia/Fiendish Chain, prioritize searching the other Lv8 Megalith that you didn’t open with if you already have access to Ophiel + Hagith, because that other Lv8 Megalith’s discard effect will replace the effect of Ophiel/Hagith to Ritual Summon that they would not have been able to use while face-down or negated.
-
On your second turn after you have used Bethor to destroy cards, in general you want to use Senju to search a Lv8 that can tribute over the Bethor to summon a Lv4, rather than immediately revive a Lv4 with Emergence. This is especially important if you had made a turn 1 Rank 4 such as a Steelswarm Roach or Abyss Dweller that survived so that you don’t clog yourself.
Full-Power Turn 1 Setup (Basic Variant, only Bethor setup)
This is a bit of a long combo, but you’ll want to set this up in the following way for 2 reasons: it fuels the GY for Bethor destroying typically 2-3 cards on the opponent’s turn, and it sets up for a comeback on later turns with the Emergence trap. Here is the end board:

Now here is how to get there with this hand:
- Senju search Hagith (or whatever the missing piece is; if you have Hagith instead of Ophiel, search Ophiel).
- Discard Bethor to tribute Senju for Hagith, search Portal.
- Activate Portal. Then, use Hagith effect to summon Ophiel, Ophiel search Och.
- Due to summoning Ophiel, you can now use the Trigger Effect of Portal to recover Hagith to the hand.
- Use Ophiel effect to summon Och, and depending on the contents of your hand, you may or may not want to activate the on-summon effect of Och to draw a card and discard a card. Use your best judgment.
- Use Och effect to summon Hagith again, searching Emergence.
- Set Emergence and that’s the turn.
On the Standby Phase of the opponent’s turn, Toggle On and check for delays. If they have no delays, flip Emergence early so that you play around Galaxy Cyclone, Night Beam, etc. If there IS a delay, they may have Cosmic Cyclone, in which case you wait until they set it or until they activate it early before you use Emergence.
- When you use Emergence, revive Och, then use Portal to recover Bethor to the hand (if you somehow have Bethor in hand and Benten in GY, grab back Benten instead for extra follow-up!).
- Before the end of the opponent’s Main Phase, you can then use Och effect to summon Bethor to pop 2-3 cards, depending on how many different Ritual monsters are in your GY.
Note that if you have Dakini instead of Bethor in your hand, then you can alternatively summon Dakini on the opponent’s turn, instead! That’s harder to time correctly, but it can be devastating too!
Full-Power Turn 1 Setup (Thinking Required! Only Bethor setup)
A lot of people would probably attempt to topdeck Bethor by using Och, but by understanding how to get around the hard once per turn of the Lv4’s, you don’t have to; ACTUALLY, you don’t have to open Bethor and Ophiel to have a regular playable hand. Say you opened 2 Hagith, 1 Phaleg, 1 Benten. That is still Bethor setup with Och in GY and Portal and Emergence. Basically, instead of re-using the same Hagith to double search, you’re going to re-use the same Ophiel.
This is the end board you would get:
- Summon Hagith with Phaleg’s effect tributing Benten, search Senju and Portal.
- Senju search Ophiel.
- Summon Ophiel the first time using Hagith, searching Och.
- Play Portal, then Ritual Summon Och using Ophiel.
- Due to summoning Och, use Portal to grab back Ophiel. Don’t need to draw.
- Och Ritual Summons Ophiel again, search Bethor.
- Discard Bethor to summon Hagith by tributing the Ophiel, searching Emergence (getting around the once per turn of Ritual Summoning via each Lv4!).
And there you have it, the same setup as the Basic Variant! Remember to treat each hand in a way that you just search the missing pieces to end on the same board, rather than simply doing the “Basic Variant” combo each time or bust.
Playing through or around Floodgate/Fiendish Chain/Photon Strike Bounzer
Let’s suppose on-summon of Senju, you feel a delay, but on the resolution of the search, you don’t feel a delay. That is likely a Floodgate Trap Hole (rather than say, Karma Cut). Most likely they would floodgate a Lv4 Megalith so that it cannot activate its effect to Ritual Summon another one, so if they floodgate Ophiel, then for your Ophiel search, grab the other Lv8 Megalith that you did not use yet. That other Lv8 Megalith can be used to tribute over the floodgated Ophiel to summon another Lv4 from hand (most likely Hagith), continuing your plays as usual. You may not get the Och setup for the opponent’s turn in this manner, but it will expend the opponent’s resources so that hopefully you have the time next turn to continue setting up your GY.
If you believe they have Fiendish Chain instead, prioritize searching the other Lv8 Megalith before you have summoned Senju. Then, if they negate Senju with Fiendish Chain (which they usually do), you’ll be able to follow up with Bethor summoning a Lv4 from hand. Of course, it depends on what they choose to negate, but Senju being a Normal Summon is the biggest magnet.
To play through Photon Strike Bounzer, what you’ll have to do is use a Lv8 to tribute Benten to summon your Lv4 Megalith, chain blocking it, then cycle through your Bentens to keep up the chain block until you reach the point where you can summon Bethor by tributing a Benten, or make an Xyz summon of Dire Wolf to force the negate. It’s a bit more of a pain than Fiendish Chain because they can wait on the negate, but because it can be chain blocked, in that respect it’s a little bit easier to play through. You can also see the “Gameplay Demonstration” section to see videos containing Thunder Dragon replays; the start of those videos declares the matchups.
“Chain Blocking”
With Och on the field, tribute Benten and itself to summon Bethor. In Duel Links, Benten is programmed to go Chain Link 3 to Bethor being Chain Link 2 and Portal being Chain Link 1. As a result, Benten chain blocks Bethor from being negated by cards that negate targeting, like Dark Cavalry and Red-Eyes Slash Dragon, and similar negates (including Head Judging and Photon Strike Bounzer, among others). All of these negating cards specifically say “When… You can negate”, so they can only respond to the previous effect on the Chain Link, and therefore, Benten covers up Bethor from being negated. A card like Fiendish Chain does not care, however, as it targets to directly negate the monster’s effects.
Playing around Floodgate (rather than through it)
To play around Floodgate after detecting it, if you have Och on the field, what you can do is use Och’s effect Chain Link 1 to draw and discard, but chain to yourself to Ritual Summon with Och on Chain Link 2. That way, if you summon Bethor off of that, Bethor is unable to be Floodgated; the last thing to occur is the Och draw and discard effect. Alternatively, you can use a Lv8 Megalith’s discard effect to attempt to Ritual Summon on Chain Link 1, then chain Och on Chain Link 2, and whether the Lv8’s discard effect resolves or not, the monster you summon off of Och won’t be able to be floodgated.
Looping Bethor to pop each turn
For this combo, you most likely have Hagith and Ophiel in the GY, and you have already summoned Bethor (probably with Och) to pop cards, and now you want to use him again on a following turn. This is how a board like this could start if you opened Xyz + Bethor setup (Bethor, Benten in hand):
and how this particular board could end up after summoning Bethor (Senju in hand, topdecked Phaleg):

For this example, here is how you can loop Bethor to summon him again next turn:
- Use Senju from last turn’s Benten search to search an Ophiel since you topdecked Phaleg, then Ritual Summon Ophiel by tributing Bethor, applying Portal to recover the same Bethor you tributed from the field. Search an Och.
- Use Ophiel to summon Och.
- You can keep this board of 1 Xyz + Och + Senju since you have Bethor in hand. Or, you can Xyz summon and detach Och so you can revive Och next turn and grab back Benten to the hand. In this example I made a Gagaga Samurai next to my Dweller.
In this case, now that we’ve looped the Bethor setup (Bethor, Benten in hand), here is how it looks for me:

This helps keep up the pressure against decks that set lots of backrow like Shiranui, or decks that have a lot of hand traps for you to fight through that might also have repeated threats like Thunder Dragons or Yosenju.
Making plays going second without costing your Normal Summon
Let’s say you open a hand like this (but the Hagith can be Och or the Phaleg can be a Bethor). If you don’t want to commit your Normal Summon too early, like if you were to expect a Karma Cut, or if you want to thin your deck and fill your GY more, you can sequence your plays as 3-card combos (Lv8, tributing Benten, summoning a Lv4) as follows, assuming you run 3 Benten:
- Use Phaleg to summon Ophiel by tributing Benten. If they hit the Ophiel with a backrow card to remove it from the field, then for your search, you can grab the other Lv8 that you did not already have, and with Benten, search Benten.
- Use that other Lv8 to summon a Lv4 in your hand that is different from Ophiel (in this case, Hagith, searching Portal) by tributing the 2nd Benten, who can then let you search Senju.
- NOW, you can commit your Normal Summon, search Ophiel again, and summon Ophiel to then go into Och, and proceed as normal.
So, with a hand like this, you basically have the full Megalith setup while playing through 1 removal card (that was badly timed by the opponent) such as Karma Cut or Raigeki Break. This kind of play can be seen in the “Gameplay Demonstration” section in the “Even MORE Advanced Plays” video where we play through a turn 1 Bounzer:
Here are the most common matchups in this meta (July-August 2021) that you may find in a tournament.
Onomat


This matchup is mostly difficult only if you are going second. If you are going first, what you’ll want to do is Toggle On and allow Gagaga Sister to search, and then on resolution, if they did NOT search Gagagawind, you might be okay to use Bethor to pop Sister and they might not have any more follow-up. If they do search Wind, let them choose what to pop with Bolt before you respond, so that you don’t simplify their options, but do not let them past having 2 Lv6’s on the field so that they cannot “surprise” you with Photon Strike Bounzer.
If you are going second (which in some instances you might prefer, honestly), here are some tips:
-
Against Photon Strike Bounzer, try to use Lv8 Megalith discard effects to summon the Lv4 Megalith(s) from your hand by tributing Benten. That way, the summoned Ritual monster’s effect is chain blocked by Benten. As you proceed to make plays, try to have a different Lv8 Megalith available so you can summon a second Lv4 Megalith, and that way you have a Rank 4 available (this can be done before Normal Summoning Senju if you opened a Lv8, Ophiel, a Lv4 Megalith, and a Benten!). You can use Dire Wolf or Malevolent Sin to force the negate if, say, you wish to enable yourself to finish setting up with Och and Hagith at the end of your combo.
-
Keep in mind, Abyss Dweller turns off Benten, which does restrict our searches if they set up Dweller and Bounzer at the same time, unfortunately.
-
Steelswarm Roach does nothing against us. Constellar Ptolemy M7 is a problem to consider, as they could be dumb enough to summon it, only to accidentally return a target of Megalith Emergence back to the hand, which incidentally reduces the number of monsters that we could destroy with Bethor.
Other than that, if you can beat a Bounzer, that’s really the main challenge. They don’t have much of a 1-card recovery after you break their board other than Head, which is not enough, especially if you have managed to loop the Och/Bethor setup.
Harpies


This matchup will certainly depend on the amount of practice you have against it and who went first. In my experience, going first requires that you open access to an Xyz (like Heraldry Patriarch or Dire Wolf), or an Och/Bethor setup. Personally I feel that this matchup is a bit easier when I am going second because they don’t get to go ham on my backrow with Hunting Ground when they go first.
Here are major tips against this deck when going second:
-
Pay attention in their Standby Phase to try to detect whether they have a Quick-Play Spell in hand or not. If they have one, you can determine whether it is Book of Moon, Forbidden Chalice, Forbidden Lance, or Swallow’s Nest as they make their plays. For example, Swallow’s Nest has no delays unless they control a Lv4 Winged Beast, or Book of Moon has no delays when no monster is on the field.
-
Some good bait is to start out by using Phaleg to Ritual Summon Ophiel tributing Benten, searching Bethor with Ophiel and Benten with Benten, and seeing if they immediately bounce Ophiel back to hand before you activate. If they let Ophiel resolve, you can just summon Bethor immediately to force out their backrow. If they bounce Ophiel before you activate, you have Bethor and Benten in hand to summon Ophiel again. At this point you haven’t Normal Summoned yet, so you can either finish your setup, or wipe their field with Bethor anyway.
When going first, consider how your hand is like.
-
If you can only make an Xyz, make Number 18: Heraldry Patriarch.
-
If you can make an Xyz while still having Och/Bethor setup, make Dire Wolf and pop the Hunting Ground.
-
If you can only achieve Och/Bethor setup… then you want to revive Och and recover Bethor/Benten to hand in the Standby Phase, and feel out the delays in the Standby Phase and during the Main Phase to check for Swallow’s Nest, then if they don’t have it, blow ‘em up! Be careful though if you can tell they are using Harpies’ Last Will.
Hope this helps against Harpies! It’s not an easy matchup, but with time you can get comfortable with it. Your best chance is when you are going second in my honest opinion, so learning the going-second plays will take you far against Harpies.
Thunder Dragons


This matchup is very doable, especially if you go first. Basically what you want to do is keep track of which “Thunder Dragon” (TD) monster effects have already activated. If the hand effect for any of them resolves, their corresponding effect for being banished or sent from field to GY cannot also apply in the same turn, and vice versa.
Here are the main situations you want to keep in mind:
-
A simple board of just Steelswarm Roach as your only monster is still great against TD’s; negate Levianeer’s summon, NOT once per turn! Don’t waste it on Duo if you don’t have to, because they could potentially use Roar to grab back Duo and re-summon it anyway, depending on their GY size. I personally like to have 2 Roach in my Extra Deck for this matchup if I keep seeing it running around, because even with an unoptimal hand, Roach can save you. If you also have Bethor in hand and Och+Benten in GY, you can use that Bethor setup to wipe out 2 Lv6’s to prevent Bounzer or Ptolemy M7 from coming out to deal with the Roach.
-
If you can afford to search Lancea on turn 1, count the number of LIGHT and DARK monsters in the GY, and if the number of both combined is 2+, use Lancea before they reach the Main Phase, or before they have the chance to summon Dragonduo or Levianeer, because they banish for cost. Levianeer especially is something you want to stop from coming out.
-
Going second, treat Photon Strike Bounzer like a chain-blockable Fiendish Chain that you know of ahead of time. This is covered in the Onomat section, but basically you’ll want to use Benten to chain block Bounzer until you can make Malevolent Sin or Dire Wolf to force the negate, then finish your Bethor setup afterwards. Or, see the “Combos/Advanced Plays” section if you want to see what your end board can look like after you play through this negate.
Overall, this basically comes down to you toggling on and timing the Bethor correctly, and them not having the perfect hand to play through that disruption. Keep up the pressure by looping the Bethor pop (see Combo section for more info!) if you can, use Roach to negate Levianeer and/or Duo, Lancea to keep them off Levianeer when you don’t have enough setup, and hopefully that’s enough!
Resonator


This matchup is usually the easiest one of your life. The occasional roadblock comes up in the form of Doomcaliber Knight or Solemn Scolding, which is just comes down to who opened better and who went first. If you opened a Senju and two Lv8’s, you may be able to play through a Scolding and Doomcaliber, and if you opened Senju and 1 Lv8, you can play through a Doomcaliber OR a Scolding.
Other than that, here are the key advantages we have against this deck:
-
Ritual Cage protects us from being targeted by Dark End Dragon and Infernity Doom Dragon, and also from being destroyed by Doomcaliber (heck, it also protects against Red Dragon Archfiend itself). It literally makes this matchup free, and they need to have the Mystical Space Typhoon to deal with this in order to get anywhere against us.
-
Emergence gives us a free grind game against this deck, which can use up its entire Extra Deck and potentially still get nowhere against us.
You can see in the KC GT June 2021 Stage 2 duel video in Gameplay Demonstration how this matchup can go with either a bad hand or a good hand. Just face a few of them and you should get the idea on how to handle it.
Here are other select matchups that you might find on the Ranked ladder. You may or may not see these in tournaments, but nonetheless they are relevant.
Gaia


As far as facing the Gaia cards themselves, this is actually a fairly easy matchup if you know what their cards do because Och and the Gaia Fusion both have effects only until the end of the Main Phase, meaning there is no conflict, and Ritual Cage protects Och from being targeted as well.
A major tip against Gaia:
- When you have Bethor setup going first, make sure you chain Emergence to revive your Megalith in response to the Gaia the Magical Knight on-Normal Summon effect so that when the Curse of Dragonfire‘s on-Special Summon effect activates, your Portal goes Chain Link 2 and you can still recover a resource. Obviously you will want to use Bethor to destroy not only the Fusion but also the Field Spell to remove their follow-up. Usually this is enough, if they don’t open Dragon’s Mirror.
We can indeed play through the Gaia Fusion setup going second, sometimes even if they also have a Treacherous. You want to surprise them without overcommitting the Lv4 Megalith effects (that Ritual Summon) too early. (If you think they have Treacherous, play so that you have only a single Lv4 Megalith on your field so that they can never Treach unless they want to lose their own Fusion.)
Two ways to handle Gaia going second:
-
If you already opened Emergence, search Bethor and summon it directly with an Ophiel from the field so that they panic because if Cage is there, they can’t target you with the Gaia Fusion in the first place. It may seem sloppy, but you should not expect to get full setup going second like this; instead you want to ruin their follow-up as much as possible, then play a bit of catch-up and set up later.
-
Try to sequence your Benten searches (searching more Bentens) if you opened two different Lv4’s, and use Ophiel to search a Lv8 you did not have. Conserve your Normal Summon of Senju if possible, so that ideally the last thing in the turn could be that you search Senju and have a different Lv8 in hand to then still search Hagith with Senju and finish your setup.
Hope this helps for the Gaia matchup! Not too difficult, but you want to watch out for if they have backrow removal other than from the Gaia Fusion itself. That’s pretty much the only thing you care about there.
Cyber Dragons


This is easily the toughest matchup for Megaliths. Overflow is what hurts this deck the most, if they know what to destroy, which are Portal and the monsters. Cyberload Fusion into Rampage Dragon already does a lot as well, popping Emergence to leave us in topdeck mode. This matchup is only doable when you go first and have nearly a full setup, with the Bethor pop. It becomes absolutely necessary to use Artifact Lancea and search it on turn 1 if you want to win.
Nonetheless, here are the main things you’ll want to do to win if they didn’t just blow you out by going first with full setup. Let’s say you open a hand like Bethor, Benten, Hagith, Hagith. The Gameplay Demonstration section shows a replay for this matchup for the more visually-inclined people.
-
When you go through your normal turn 1 setup, since you started with 2 Hagith, you’ll want to wind up re-using Ophiel rather than Hagith for the opening combo, and you should still end up having the Bethor setup. On their turn, Toggle On in the Draw Phase, and check for a Quick-Play Spell delay. If they have a delay, then after they activate Cybernetic Fusion Support, if on resolution, there is NOT another delay, immediately flip Emergence, but don’t activate the effect yet, and (just to be sure) check for another delay. If there still isn’t one, they don’t have Cosmic Cyclone (although they could have hard-opened Cyberload Fusion if they had no monsters), and you can revive Och and recover Benten to the hand.
-
Now that you safely have the Bethor setup, if they have Fusion Gate, let’s assume they activate Cyber Style before Fusion Gate instead of after (so that you can respond on resolution of Fusion Gate). If that is the case, you can then summon Bethor to pop the Proto-Cybers (and the Fusion Gate if you can), tributing Benten to search Lancea. With that, they should not be able to follow up, unless they still have Core to search Cyberload Fusion. In that case, just wait for them to activate it (if they even have the guts to do so), and then you can chain Lancea to instantly fizzle it (because the required materials are in the GY).
If you can accomplish all that, you might win next turn because they didn’t fuse, and they can’t use Proto-Cybers in the GY for Overflow (only Core), so most likely they can at most pop only 1 with the Overflow that they might have opened. At that point you’ll both be in topdeck mode, and that’s really your best bet.
Overall, obviously a coinflippy matchup, it won’t be easy, but I guess it’s winnable.
Shiranui


This matchup is dependent on who goes first. If you go first, prioritize popping their backrow with Bethor. If you go second, be ready to play through cards like Ballista Squad, Fiendish Chain, and Floodgate Trap Hole. The first of these is the most devastating if they know when to use it. As for the second two, see the section called “Playing through or around Floodgate/Fiendish Chain” to learn how to play through those.
Otherwise, here are some key interactions to watch out for:
-
Their opening play nowadays is either set Spectralsword or Normal Summon Gozuki/Samurai Skull. Don’t worry about stopping them from milling from the Deck. Again, just prioritize popping their backrow and leave their monsters alone during their first turn, then you will have the chance to OTK the following turn with a Phaleg-boosted board.
-
If you see them with Solitaire and Spectralsword in GY, keep in mind their Shogunsaga can get to 5500 ATK, and do NOT leave a Senju in Attack Position out in the open without a backup plan. What you COULD do is think ahead and have your Och tribute Senju for your Lv8 Ritual Summon if you need to dodge getting hit for lethal (even though you destroy 1 less card with Bethor that way).
-
Abyss Dweller can come up against Spectralsword, although since this matchup is so uncommon nowadays, it would be a blind Dweller.
Other than that, not much to really say. Shiranui got hit so hard on the December banlist that they went from cumbersome to face, to just… boring.
Noble Knights


This matchup is one you don’t want to turn into a grind game, and is in your favor when you go first. Basically what you want to do is interrupt their Normal Summon and pop it with Bethor, and they just lose if they don’t open Glory of the Noble Knights to activate Destiny from the deck. You especially want to do this if they open Merlin because then it does not matter that they opened Glory (he’s not a “Noble Knight” monster). Nowadays they don’t have Balance, so the chances that they open full combo are also much lower.
If they went first, the most they can do on your turn is typically summon Drystan to target a face-up card and destroy it via a mandatory Trigger Effect. What does this mean for us?
- They can’t target your Ritual Monsters due to Ritual Cage, so they can only target Ritual Cage, Portal, or Emergence (still inconvenient).
- Targeting Emergence hurts a lot, even though you can chain to it.
- Targeting Portal still allows it to resolve because Drystan is mandatory and will be CL1 to Portal being CL2, regardless of turn player—provided you chained Emergence to the activation of Glory or an equip.
Now, what would be the best methods of interaction? Let’s see.
-
If you would summon Bethor, you should activate Och while they have 2 Spell/Trap Zones occupied (to play around Glory) and neither Equip Spell is Noble Arms of Destiny (because destruction protection), while a Merlin is not in their GY (so they can’t dodge). If possible, try to do so while your Abyss Dweller is next to it, because it turns off their equips from re-equipping.
-
Speaking of Dweller, Dweller will stop their equips from re-equipping, which means they cannot do the ordinary Medraut combo properly, and are stuck to a Rank 4 unless they specifically opened two Equips and the Gwen actually is in the hand. However, keep in mind that if you do this while you do NOT have Bethor setup, that guides them to make the Rank 4 Artorigus to pop your backrow, so it may not be a good idea turn 1 unless your hand is already good.
-
You would think Artifact Lancea might not come up, but if you can catch them with mismatched levels and a full field (like a Lv4, Lv5, and a Merlin on the field), the Trap (GY) and Merlin (GY) are both incapable of activating, so Lancea at that point will allow you to freely Bethor and stop any further pushes. This also applies for a good timing to activate Abyss Dweller due to how the Trap and Merlin are both Quick Effects.
Lastly, just because both Megalith and Noble Knights will have a lot of Trigger Effect interactions, I’m going to review the core principles of how they work:
-
Trigger Effects are placed on the Chain Link in this order: Turn Player Mandatory -> Non-Turn Player Mandatory -> Turn Player Optional -> Non-Turn Player Optional
-
They always activate on the Chain Link after the Chain Link in which the effects met their condition.
So, for example, if it is YOUR turn while they use Merlin CL1 and then the Trap CL2 (in the same Chain Link), and you chain Emergence (CL3), the cards that meet their condition are:
- The Rank 4/5 Artorigus Xyz on-Summon will ask to equip “Noble Arms” Equip Spells from the GY
- The Equip Spell(s) will ask to re-equip by their own effects from the GY
- Megalith Portal will ask you to target a Ritual monster in your GY to recover.
These are all optional effects, so how it will occur is based on turn player and how Konami programmed the Chain Links. In Duel Links, it should be like this:
Portal CL1 -> Rank 4/5 Artorigus CL2 -> Equip Spell(s) CL3+ (if they choose to equip to Drystan)
(Only after all that will Drystan potentially activate, on the next Chain Link, and then they can target—after Portal recovered a Ritual monster already.)
Overall, this is a matchup where either side could win, depending on the aggressor. Megalith can achieve huge monsters which would be very good to close out the game quickly, while Noble Knights can use their Rank 4 to pop backrow (including Ritual Cage) without targeting before using the Rank 5 to pop your monster(s) and push for game that way. Just don’t let this drag on too long, and win ASAP!
Desperado


This matchup is better when you go first (but with a good enough hand you can sometimes play through their disruption going second). The buffer we have against this deck is the Ritual Cage, which says that Desperado can’t destroy us by card effect. The momentum swing they need to beat us will most likely be due to Twin-Barrel Dragon popping the Ritual Cage. Besides that, the Machina Fortress is unable to crash to use its own effect to pop any card because Portal is protecting by battle, and because you’re usually going to summon in defense until you go for game. Their most likely relevant backrow are Karma Cut and Head Judging. I think as long as they don’t just open their whole deck in their hand (we can play through 1 Karma Cut), you should have a decent chance, especially going first.
Some key interactions to keep in mind:
-
Super Team Buddy Force Unite! is a common backrow they have, which is a bit annoying because if you pop it, they set new copies. However, if you don’t try to pop backrow against this deck, you may regret it when you see Karma Cuts. If you want to put your mind at ease, you can summon and activate Abyss Dweller before you use Bethor, and that would turn off the floating effect of Buddy Force(s).
-
A “Megalith” monster revived with Emergence is indifferent to Karma Cut because it would return to the bottom of the Deck instead when leaving the field. Keep track of that so that you can Xyz into Diamond Dire Wolf and bait out a potential Karma Cut onto either your Megalith Och (so it can chain), or a monster that would return to the Deck when it leaves the field.
-
Head Judging is such an annoying trap, but you can somewhat play around it two ways because it only negates monster effects activated on the field. By tributing Benten using a Lv8 Megalith’s discard effect to Ritual Summon a Lv4 Megalith, you can chain block its on-Ritual-Summon effect from being negated by Head Judging. You can also summon Och first if you already have Ophiel or Hagith in hand, then on-Ritual-summon, trigger Och to attempt to draw and discard. If they chain Head Judging to that, chain Och to summon, say, Ophiel from the hand. That way, your draw effect is negated, but you will NOT be able to lose control of Och to your opponent. Then, sometime later in that turn, go for Bethor to pop the Head Judging and proceed from there.
-
If you’re afraid of Fiend Comedian, keep in mind that if their deck size is smaller than your GY, they can’t activate it. So, if you load your GY to have around 10 monsters over the course of the duel using Och to dig for Bethor or Phaleg, by the time they Cup of Ace twice and 2 turns have gone by, they won’t be able to banish your entire GY. It sounds like it wouldn’t come up, but it has happened to me before.
Overall, I would say it’s not that bad of a matchup, but it’s not one you want to allow to get to a grind. Try to beat them as quickly as you can, popping their field with Bethor until you can poke directly.
Blue-Eyes


This matchup is a pain, and what you want to focus on is the backrow first.
Depending on how much backrow they have if they go first, you may not have enough to play through all of it, and that would just be it. They carry cards like Raigeki Break, Karma Cut, and Ultimate Providence, and although there are ways to play through those, your hand needs to be quite good to go second (specifically, you need Phaleg OR Bethor in hand, with Benten and two Lv4 Megaliths, ideally one is Ophiel, and they ideally only have 1 disruption).
If you go first, then if they Normal Summon Ancients, they have Sage into probably Spirit of White; use Emergence in response to Sage (OR before they activate Sage, either way gives more or less the same result), to recover resources with Portal to have that Och + Bethor setup. Then, allow them to choose what to snipe, and wait for them to set backrow before using Och to summon Bethor because the backrow is what we should go after first. If for whatever reason they try to trick you by entering Battle Phase or End Phase early, just don’t even activate Och on their turn if they have no backrow.
Other tips to keep in mind:
-
Abyss Dweller will turn off any of the Stones (Ancients, Legend) from activating, so you can stop them from summoning Spirit of White off of Ancients by making a turn 1 Dweller, or a Dweller mid-combo (BEFORE you set Emergence), when you believe they will discard an Ancients. You could make any Rank 4, so there is no good reason for them to stop you from making one.
-
Portal prevents you from getting destroyed by battle once for each Ritual Monster, so Twin Burst Dragon will actually banish each monster it battles unless the Megalith was revived with Emergence (in which case it goes back to the Deck instead).
-
Win as fast as you can, because they will have a stronger board than you over time after they get rid of Portal and Emergence. At that point you are basically going to have to summon Phaleg(s) to beat over their monsters, typically having 3100+ ATK (2+ Ritual Monsters in your GY).
-
Against Spirit Dragon, after you have already gone for the backrow, just try to beat over it with a Phaleg-boosted field to force it to either tag out or just die to 3100+ ATK. If they are too stubborn to tag out early, don’t even bother ‘forcing’ it to tag out with Bethor.
-
…On the other hand, if you happen to have Och+Bethor set up and they decide to activate Spirit Dragon early to tag out, definitely chain Och there, so that Bethor (optional effect: CL2) can target the Azure-Eyes and all the other dragons on the field and destroy them before they can be protected by Azure-Eyes (mandatory effect: CL1)!
Overall, this is going to come down to you going first or second, how much momentum you gain by popping their backrow successfully, and how good your topdecks can be after they’ve banished Portal and/or Emergence.
Invoked Neos


This is surprisingly an easy matchup. The hard part specifically is the backrow, and the existence of Diamond Dire Wolf in their Extra Deck. Normally Purgatrio is an OTK, but the only way it is against Megalith is if they pop Ritual Cage with Dire Wolf, Ballista Squad, or Raigeki Break. Funny enough, Elemental HERO Brave Neos is only 2600 ATK unless they’re also on a mini Elemental HERO Stratos engine, and so is Ritual Beast Ulti-Apelio if they’re on the Spiritual Beast Tamer Winda engine, while Bethor, Och, and Ophiel are as beefy or bigger in DEF.
Nonetheless, here are some tips on playing against them in general:
-
Assuming they have a disruption, prioritize acquiring a Phaleg and a Bethor in hand during your plays going second. The Phaleg or Bethor will allow you to start your plays, and the other one will allow you to play through a Fiendish Chain or Floodgate Trap Hole by substituting the Lv4’s on-field effect to Ritual Summon with the Lv8’s discard effect to Ritual Summon.
-
Your win condition is generally just a Phaleg-boosted board. Get huge and beat over their field. If you have Dakini, you also have piercing to close out the game more quickly.
-
Prioritize taking out their backrow over their monsters if you are going first. Once that’s dealt with, the only way they can win is to make Dire Wolf to pop Ritual Cage and then Purgatrio OTK. By then you should already win.
-
Abyss Dweller can disallow your opponent from recovering Invocation if you wish. More practically though, you can turn off the floating of Winda, and I suppose the searching effect of Volcanic Shell.
Overall, not a very hard matchup in terms of the monsters, more so the backrow (and somewhat the Stratos to pop backrow if they have it).
Water Xyz


This is not a hard matchup at all. The main things we have to watch out for are the Atlantean Heavy Infantry popping a Megalith Spell/Trap, and Dweller turning off a Benten search. Dweller only hurts our bad hands. If you go first and they summon Infantry as their first action, all you have to do is pop the Infantry and they can’t make any plays other than set backrow (the extra Normal Summon is not gained).
Other miscellaneous tips:
-
At the very least, if you want to allow them to summon a monster past just an Infantry, the main thing to keep in mind is to destroy their monsters with Bethor before they can activate their Territory of the Sharks skill because you can’t respond on resolution of the skill.
-
Some of them run Necrovalley, so be sure to summon early with Emergence to utilize Portal before Necrovalley hits the field, OR try to have Bethor in the hand before the end of your first turn so you can simply chain to Necrovalley to revive the Och. The latter option is safer if you can manage it.
-
Book of Moon in the Main Phase actually only does something to Megaliths if they use it pre-emptively against the Lv4 Megaliths (except for Och!). Treat it in the same way as playing against a Canadia. If they chain Book of Moon to our effect on the field which Ritual Summons, feel free to uh, laugh at them.
-
Whenever Dweller activates, it detaches for cost (cannot be negated), and then the Atlanteans trigger on the next Chain Link, often Chain Link 1 because they are mandatory effects. Hilariously, you can make your own Dweller, then chain yours to theirs to turn off their Atlanteans.
Otherwise, this is again, not very hard of a matchup. You basically just want to do your best to not brick, and pay attention during the duel and it should be fine.
Blackwings


This matchup mostly depends on who goes first.
Basically, if you go first, and they somehow don’t have Cosmic Cyclone for your Emergence (as confirmed by no delay in the Standby Phase with Toggle On), you want to flip it early and at some point revive the Och and recover resources with Portal to set up the Bethor pop on their turn. Since you’ll usually pop 2-3 cards, what you’ll want to do is let them resolve Simoon, then perform their actual Normal Summon beyond that.
If you go second, check for a Draw Phase delay and they might have Cosmic Cyclone. So, you could go through almost the full setup if you have access to it, but before you set Emergence, you would typically have a Senju and a Lv4 on the field. Check who (Ophiel, Hagith, Och) you have Ritual Summoned with already, and the last one you have NOT used should be used to Ritual Summon Bethor immediately, popping their whole field and Cosmic Cyclone. Then you can set Emergence and proceed from there.
NOTE: The smart players may not commit their Normal Summon too early on. Here are some tips for when they don’t commit their actual Normal Summon for as long as possible, or if they have the Zephyros to extend with:
-
If you can open a turn 1 Steelswarm Roach, put it in Attack Position (reducing damage from Bora pierce, and forcing them to have Gale or bust). Roach will typically convince them to not even Synchro. Only Kris can tie with it (unless they have Harpie’s Hunting Ground), and Roach would negate the proper Synchro Summons of Raikiri, Hawk Joe, etc, PREVENTING them from being revived later on!
-
If they don’t activate Level Reduction yet, but they have 2 monsters on the field (including a Raikiri), just destroy them before they activate the skill so that they have no window to surprise you with a Raikiri activation before you can respond.
Other miscellaneous tips:
-
Artifact Lancea is only effective against Blackwing-specific plays if they have Simoon and you just shotgun it before they activate Simoon. It’s risky, but you may want to do it anyway. If you feel a delay in the Draw Phase though, activate Emergence early to see if they activate Cosmic Cyclone on it at that time. If they do, you can chain Lancea and stop both Cosmic AND a potential Simoon.
-
If they’re on Necrovalley, remember that while you can revive with Emergence early, you CAN wait on applying Portal’s effect to recover resources until you’ve summoned Bethor (in that case, try to already have Bethor in the hand if possible). That way, Portal will be CL1, and Bethor will be CL2, popping Necrovalley before Portal recovers the resource, which means it will be able to resolve properly.
Overall, if you can survive their one big push by destroying their board before they can build it up, and beat over their board once with a Phaleg-boosted field, there should not be much to come back with.
Witchcrafter


Interestingly enough, this is not the worst matchup for Megaliths, but it is pretty annoying because Verre can negate all your monster effects at once without targeting. The way you’ll want to win here is either by deckout, or they have to not have a follow-up Witchcrafter Masterpiece to neglect negating you in the first place.
To win against this deck, you need to bait out the Verre negate. This is the hard part, and I think against a good player, you’ll have to summon Bethor (tributing Benten) to do so. Then, if you can search Benten with the Benten that you tribute, the end goal is in sight when you can tribute Benten(s) with the Rank 8 Heliopolis to destroy Verre(s), searching a Senju at the end of the combo to proceed for 4400 damage for lethal. If at that point Emergence is still able to revive a Lv4, you can go further beyond with Gagaga Samurai alongside!
Other key interactions to keep in mind:
-
You may very well clog your board with Xyz due to using up their effects after being negated too many times in the grind game. Remember that they cannot be tributed for Ritual Summons, so try to NOT clog your board further by using Emergence to revive a monster, because then you have to rely on topdecking a Lv8 Megalith to tribute it off.
-
Och acts before the end of Main Phase, but so do the small Witchcrafters, so you may just pass priority over to them to activate first and summon Verre. That will simplify the situation so that you don’t have to worry about them tagging out and summoning Verre to dodge Bethor.
-
If you summon Dakini while they have only 1 monster and it’s not Verre, they might be screwed because she can’t negate in time and you don’t target. You will have to be sure that they don’t have Holiday in hand nor Masterpiece in GY though so that you can close out the game ASAP.
Overall, obviously Verre is the real threat here. They don’t rely on the Lightsworn engine as much as they used to, but they don’t even need that against us as we’re an all-monster deck. Hopefully the above helps handle the matchup, but if they just open better than you, it is what it is.
Ritual Beasts


This is a surprisingly easy matchup. You should win this most of the time if you understand what Ritual Beasts do. The main things you will want to keep track of are:
- Who was Special Summoned that turn (Winda, Elder, Cannahawk, etc.)
- What has been searched (Lara, Return, Bond, etc.)
- Quick-Play Spell delays (Cosmic Cyclone, Return, and/or Bond)
Here are key interactions to keep in mind:
-
Assuming they open full Elder + Cannahawk combo, the best time to pop their cards is on the first 2 Normal Summons. As soon as they summon Elder and Cannahawk, revive your Och and grab back what’s needed to have the Bethor setup. If during that time you feel a delay, you know they have Ritual Beast’s Bond. That’s okay, target them with Bethor anyway and force them to use Bond early, because then they are forced to basically end their turn with no searches unless they want to expend Ritual Beast Return.
-
Cyber Angel Dakini is your friend here. If they ended on 1 monster, she will force them to tag out, and they will send 1 of their remaining monsters to the GY, most likely leaving behind a Winda. Dakini will then allow all your Ritual Monsters to pierce, so together with Phaleg, you will become over 3000 ATK with piercing on 2-3 monsters. That should be game.
-
Abyss Dweller is nice against Winda to stop her floating, although it’s not necessary. Still, if it makes the matchup easier, why not take it into consideration?
-
Spiritual Beast Pettlephin cannot target your monsters until it targets Ritual Cage. So, if they don’t have Cosmic Cyclone, they will have to go through the Cage first every time, and in the meantime, you can re-activate it when they fail to bounce enough cards. Some builds use See You Later! to use Pettlephin 3 times, but that’s very rare and resource-intensive to pull off.
-
Funny enough, a turn 1 Steelswarm Roach (if you see Mokuba DSOD, that’s a decent indication it’s Ritual Beast) will negate the Summons of the Fusions. This even destroys Ulti-Pettlephin because it never hit the field and therefore does not have protection from being destroyed. With no prior setup, none of the Ritual Beasts are big enough to get over 1900 ATK, so they would have to hard-open their one-of Ritual Beast’s Bond.
-
Artifact Lancea literally ends their turn. If there’s ever a matchup that Lancea is MVP, it’s this one.
Overall, it usually won’t be too difficult to win. You just have to be patient and pay attention to what is going on.
Crystrons


This matchup is fairly easy, now that Crystron Impact is not playable in it anymore, even though we used to chain block it by tributing Benten when summoning Bethor on the opponent’s turn. Many of their plays are now more all-in and they have lost a lot of consistency. One of their main ways to make Crystron Ametrix now is using Crystron Quan and Crystron Rosenix, for example, and they can no longer make Crystron Quariongandrax without using Tuners outside the archetype.
Nonetheless, here are some key interactions to look out for:
-
If you went first with the Och/Bethor setup, just destroy their field right before they end their Main Phase (even if they try to bluff having no backrow). At that point their only follow-up is probably Crystron Sulfefnir in the GY, and whatever non-Tuner they had on the field (Crystron Smiger or Crystron Thystvern at best), which essentially just leads to a single Synchro like Coral Dragon.
-
Also good going first is Abyss Dweller. If you realize you are playing against Crystrons (like if they start with Sulfefnir effect), then just chain Dweller early so that if Sulfefnir is destroyed, it will have no effect, AND they won’t get any GY effects from Thystvern search, Rosenix token generation, etc. It can legitimately auto-win the matchup if you can steal the game next turn.
-
Going second when you believe they have an Ametrix setup, go a little bit aggressive and attack into the Tuner to force out the Ametrix, while also having the Bethor setup if possible, because it’s easier to grind through their resources than it used to be.
-
Against Sea Stealth Attack (SSA), while they can just banish their monster to protect SSA, you should usually target at least Umi as well as monsters with Bethor, because Citadel Whale can only negate if you only target 1 WATER monster. That will at least force them to dodge.
Overall, not too difficult anymore. As long as they are not capable of making Black Rose Dragon, Megaliths have the advantage to outgrind them.
Dark Magician


This matchup is usually not that bad if you go first and have the ability to pop cards with Bethor. It goes without saying—just destroy all the backrow and clap them next turn. The real challenge is if they somehow open full combo going first when they have 3 total copies of Rod and/or Navigation combined, or if they have backrow like Karma Cut or Floodgate Trap Hole. At that point, just try to make intelligent reads, like how Karma Cut only gives delays when you have a face-up monster.
Recently they adopted the Star Seraph “Stick and Chair” engine to draw 2-3 cards and destroy 1-2 cards. Just make sure that against that, if you have Bethor, just pop the Scepter so that their two Sovereignty’s clog their board from both using Navigation and from Xyz summoning. That’s really the main threat in Dark Magician at the moment. (Keep in mind they can Tribute Summon, of course.)
Anyways, here are some key interactions to keep in mind:
-
You’ll want to trick them to negate early with Navigation(s) in GY. Sometimes you can bait it in their End Phase by attempting to activate Emergence (don’t worry, it won’t send itself to the GY because its activation is not negated), or by trying to recover cards to the hand with Portal. They might also attempt to negate Ritual Cage to do battle damage if you went aggro with Bethor in Attack Position.
-
They might be banishing your cards on their turn more often than before because of having fewer Navigations, so they might use a card like Dark Magic Curtain or Dark Magic Veil to trigger Circle. Because of that, having or searching Lancea can come in handy for once.
-
If you are going second into a potential full combo, go a bit aggro and try to surprise them with when you summon Bethor; if they chain Navigation to a Lv4 Megalith’s effect to Ritual Summon, since it’s your turn, Bethor will be CL1 and Circle will be CL2, which means it will not fizzle. If they wait until Bethor hits the field, it’s too late and Circle will not even trigger in time.
Overall, this is mostly winnable now; just watch out for the random impactful backrow they could have that fills backrow slots for Balance, OR if it is See You Later!, watch for the Star Seraph combo, and uh… just go first, obviously.
Gouki


This matchup mostly depends on your opponent opening few backrow. The way I usually win this is by having control of their board, popping cards with Bethor before they can establish too much backrow. There really isn’t much to say otherwise. Their most common backrow is Floodgate Trap Hole, Ballista Squad, Enemy Controller, and Fiendish Chain. Of these, only Ballista Squad and Enemy Controller are particularly impactful. You can play through the rest with a bit of foresight.
Nevertheless, here are tips to win this matchup:
-
Abyss Dweller stops all their floating, so in a game 2, you might want to make it before you summon Bethor, if possible.
-
Against Necrovalley, which they usually run, Duel Links is programmed to place Portal CL1, Bethor CL2, so you’ll naturally have an out to it by waiting to apply Portal after summoning Bethor. Basically, Bethor will pop Necrovalley before it negates Portal from recovering cards.
-
Keep applying the pressure by tributing off the Bethor you summoned on the field (using a Lv8’s effect) in order to summon a Lv4 Megalith (preferably Ophiel to search a Lv8), then using Portal to recover that Bethor (if you aren’t drawing into Bethor otherwise). This is a loop, and is described in more detail in the Combos/Advanced Plays section under “Looping Bethor to pop each turn”.
-
Remember you can chain Och to an effect (including its own effect) to Ritual Summon on Chain Link 2. That will make the monster you summon (like Bethor) dodge Floodgate Trap Hole. This is also described in the Combos/Advanced Plays section under “Playing around Floodgate (rather than through it)”.
An interesting note: If they use Enemy Controller to tribute their monster to take control of your Lv4 in response to its effect that Ritual Summons, that will fizzle it. However, this is not an obvious interaction to figure out, so maybe they don’t know how to do that, but you should not put it past them to figure that out by accident.
Realistically, this matchup shouldn’t be too hard, and it’s mostly their backrow that should be troublesome. If you go first and have the Bethor setup, it’s easy enough. If you go second, you might have to play through backrow, and that’s when it requires a bit of finesse; a hand containing Phaleg AND Bethor will help, if they time their backrow poorly enough.
HEROs


This is a relatively doable matchup, but several factors can make this quite difficult. Plasma negates your field from resolving, and from getting a boost with Phaleg, while Masked HERO Blast quick-bounces your Emergence back to the hand to fizzle it. Keep in mind that Steelswarm Roach does almost nothing against HEROs (except against Plasma I suppose, since you would negate the Summon before Plasma hits the field to become live).
Some things that help us are:
-
Ritual Cage prevents Plasma from equipping us (until Blast comes out and bounces the Cage).
-
Nowadays we can summon turn 1 Steelswarm Roach. That actually would negate Plasma from hitting the field, and if you can back it up with a Bethor setup, you have a great chance.
-
Portal stops Anki from destroying us by battle for his first attack onto each monster. Also, a “Megalith” monster revived with Emergence would return to the bottom of the Deck, and that is hard to keep track of for your opponent, so if Anki attacks into such a monster, it won’t be sent to the GY. That means both Portal and Emergence stop Anki from searching for Mask Change / Form Change! Nice.
To beat HEROs, here are some key hurdles to get over:
-
If they have 2 monsters on the field but have not Normal Summoned yet, AND you did NOT feel a Quick-Play Spell delay when there were 0 monsters on the opponent’s field, it’s a good time to play around a Stratos by using Emergence early to revive a Lv4 Megalith, and then apply Portal to recover Bethor/Benten/whatever. If at that point they summon Stratos, there’s not much point to destroy backrow, so they might search for Plasma. So, you’ll want to Toggle On, then on resolution of the search, activate Och to summon Bethor and try to pop all 3 monsters. This will make it impossible to summon Plasma, and might force Mask Change(s).
-
If they got Plasma out but no Blast, they can’t even target you (so they’re 1900 ATK), so at that point you want to sit until you can either use a Lv8 Megalith effect to Ritual Summon a Phaleg and beat over Plasma, or summon Senju and make a Rank 4 that can beat over Plasma (Dire Wolf, Utopia, etc).
-
If they got Blast out, just keep fighting it. Keep re-setting Emergence and re-activating Ritual Cage, and eventually they’ll run out of LP to pay to bounce both. The only thing Blast is good for is bouncing backrow, but there’s too many to answer by himself as he’s once per turn.
Overall, it’s definitely a sweaty matchup, but there are some decent counters we have, like stopping Anki searches and avoiding Plasma targeting us, or even just negating the Summon of Plasma. It’ll be a struggle but it’s winnable.
Man, that was a long one. Hopefully you guys got something out of this, because this is one of my favorite decks in Duel Links. It rewards intellient players, and whenever I win with this I feel accomplished. If you have any questions and you happen to be a DLM Discord member, be sure to hit up the #megalith channel for help, because this deck is not easy to learn and we will help!
Perfectly formatted and uploaded by Jadehex. Thumbnail designed and created by Jadehex.